
Hammer with Absorption
Flags hammer and inverted-hammer rejections only when the long wick is backed by stacked absorption, then draws a live zone forward until price tests it.
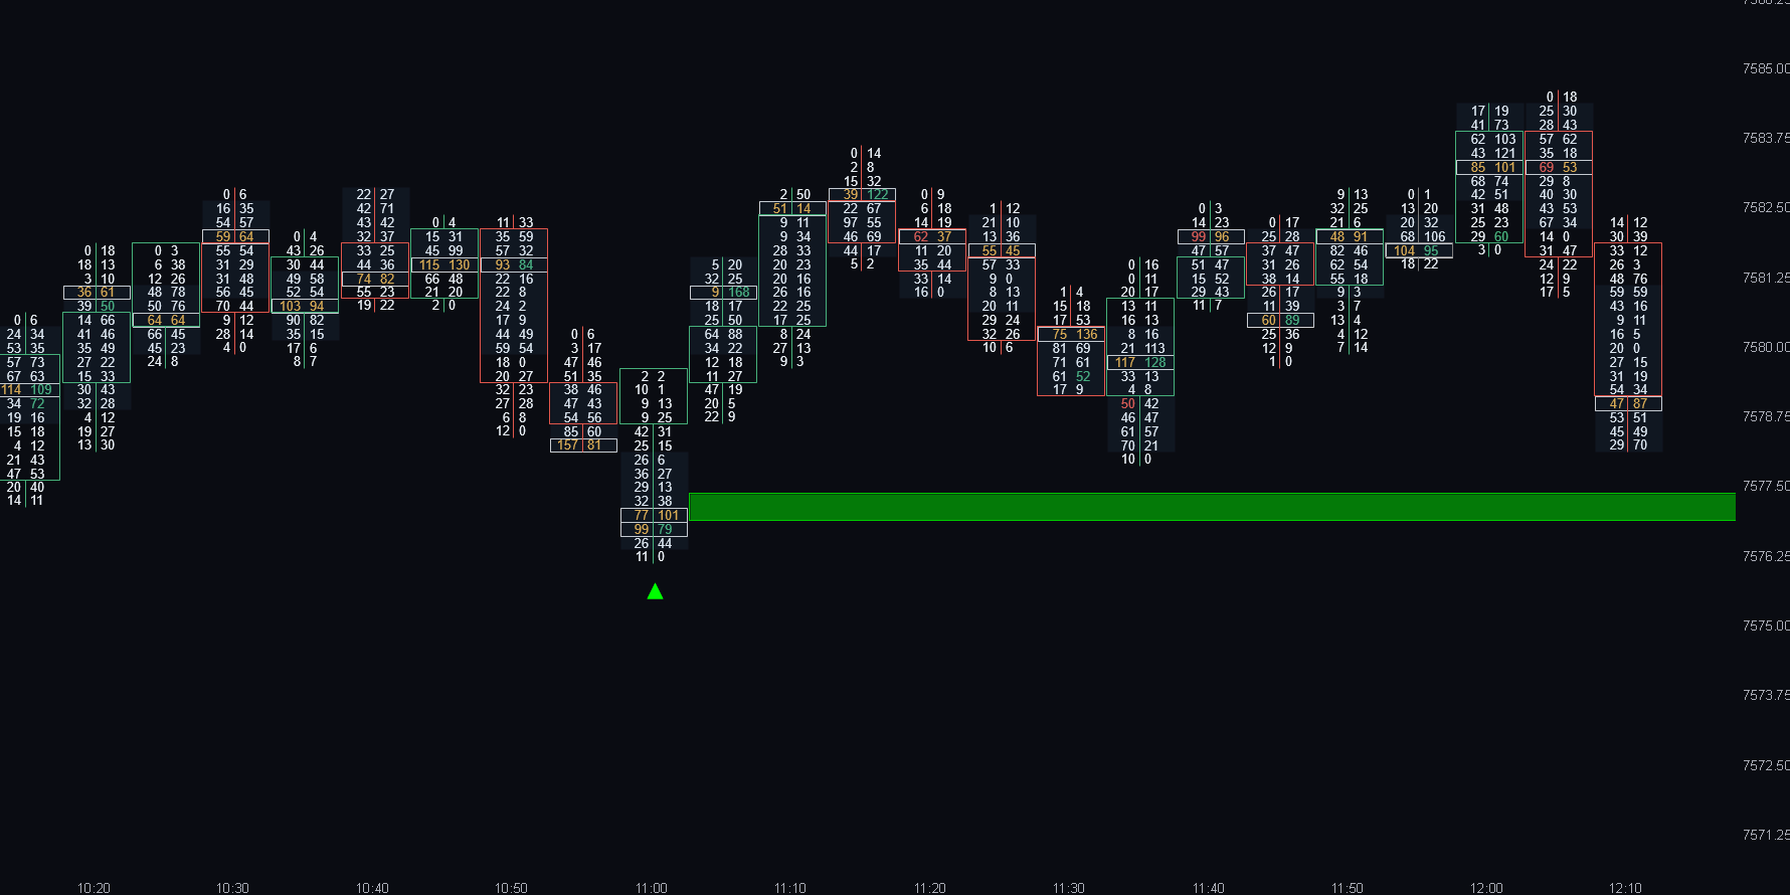
Real capture — ES footprint with Hammer with Absorption running. Hover to inspect.
Most hammers are noise.
Plain hammers and shooting stars fire everywhere. A wick only matters when aggressive traders pushed price into it and got absorbed by resting orders on the other side.
This indicator refuses to signal on candle shape alone: it opens the footprint of the rejection wick and confirms that opposite-side aggression was actually soaked up before it prints anything.
Built to do one job well.
Cosmetic hammers filtered out
Your attention goes to the few candles where the rejection wick actually absorbed aggression.
The footprint read, done for you
The wick must show genuine stacked absorption rather than one lucky print.
A level, not just an arrow
The absorbed price band draws as a live zone that projects forward until price returns to test it.
Optional POC filter
Demand the absorption sit at or beyond the candle’s value when you want fewer, stronger signals.
Strict rules, no guesswork.
A candle first has to pass a strict shape test. Only then does the indicator open that wick’s footprint and verify genuine stacked absorption in the direction that traps the aggressor.
When both gates pass, the arrow prints and the absorbed band becomes a forward zone that stays live until tested.
The detection logic itself is our work: refined on live tape, and the reason the tool is worth paying for. Sensitivity, filters, colors and display are all yours to tune.
When it helps, and when it won’t.
Built for
- ✓Rejections at swing highs and lows and prior-session extremes
- ✓Value-area edges where you want wick confirmation
- ✓A defined band to lean on or fade after the signal
- ✓Futures and most crypto perpetuals
Not built for
- ✕Blind entries in a strong trend
- ✕Ultra-thin instruments where a couple of prints fake the read
- ✕Chart types without per-price bid and ask data
- ✕Spot forex
Questions, answered straight.
What data feed do I need?
Which chart types and timeframes work best?
Does it repaint?
Can I combine it with my other order-flow tools?
How does the 7-day free trial work?
This is 1 of 15. Own them all.
Hammer with Absorption is one piece of the Order Flow Suite: every indicator we make, and every one we release next, in a single one-time purchase.
Ready when you are.
One payment, yours for life. Or test it free for 7 days on your own ATAS data first: no card up front, nothing to cancel.